Introduction to Lightsail
As many of you know, Amazon Lightsail is Amazon’s “affordable” hosting option before moving into the full AWS universe — where services like RDS and friends can drain your wallet at an impressively fast pace if you’re not careful. Plans start at $3.50/month — not bad, until you open the AWS calculator and need a moment to collect yourself.
I’m using the LAMP option. Once the instance is up and running, the recommended steps are:
- Assign a static IP.
- Add the desired domain or subdomain (DNS pointing to that IP).
- Check the database credentials.
- Access phpMyAdmin securely.
- Enable SSL.
- Maintenance and backups.
Note (2026): Lightsail LAMP blueprints were updated in January 2026 with PHP 8 and IMDSv2 enabled by default. If you’re on an old instance, the cleanest path is to spin up a new one with the updated blueprint and migrate your content — trying to update the stack manually is more pain than it’s worth.
Assign a Static IP
Once the instance is created, go to the top menu → Networking and assign a Static IP to your instance.
This matters: the static IP persists through stops and restarts. If you rely on the dynamic public IP and reboot the machine, it may change and leave your DNS pointing at nothing.

Add a Domain or Subdomain
From the top menu (before entering the instance), go to Domain & DNS → Create DNS zone.

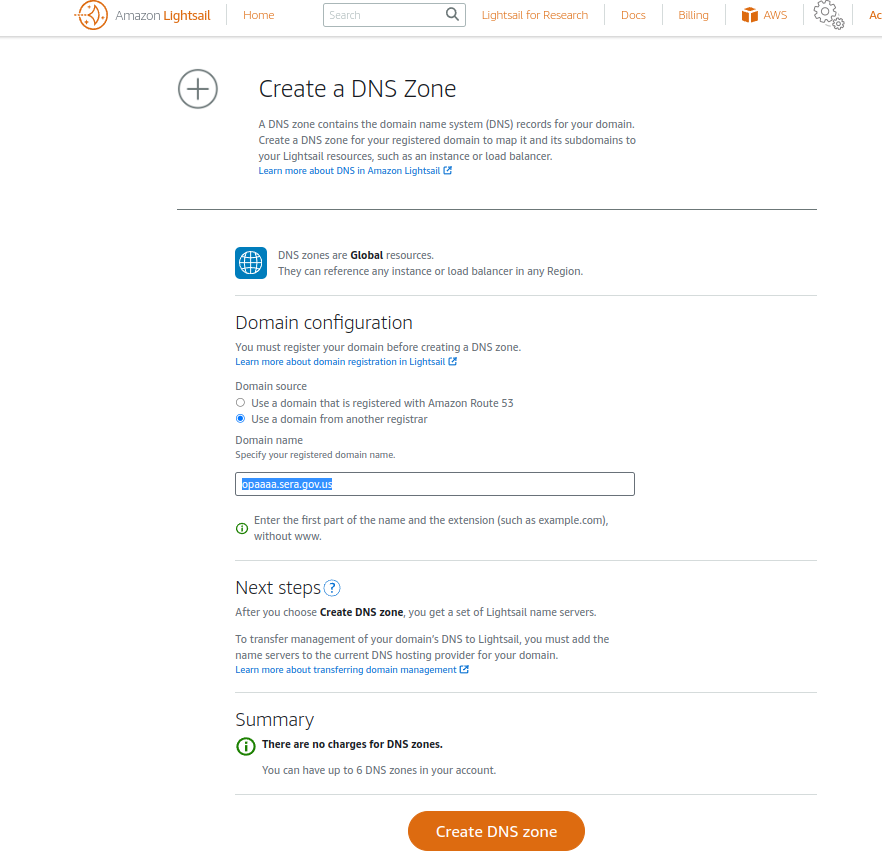
Once the DNS zone is created, add two A records pointing to your static IP:
yourdomain.com(apex)www.yourdomain.com
Both are needed: bncert-tool will validate them when setting up the certificate and configure redirects automatically. After a few minutes of DNS propagation your server will be reachable by domain name.
Configure the Database
If you’re using Bitnami’s LAMP image, database credentials are in the stack config files:
cat /home/bitnami/bitnami_application_password
Or check /opt/bitnami/apps/ for your MySQL/MariaDB user, password, and settings.

Quick database backup before any changes:
mysqldump -u root -p database_name > backup_$(date +%F).sql
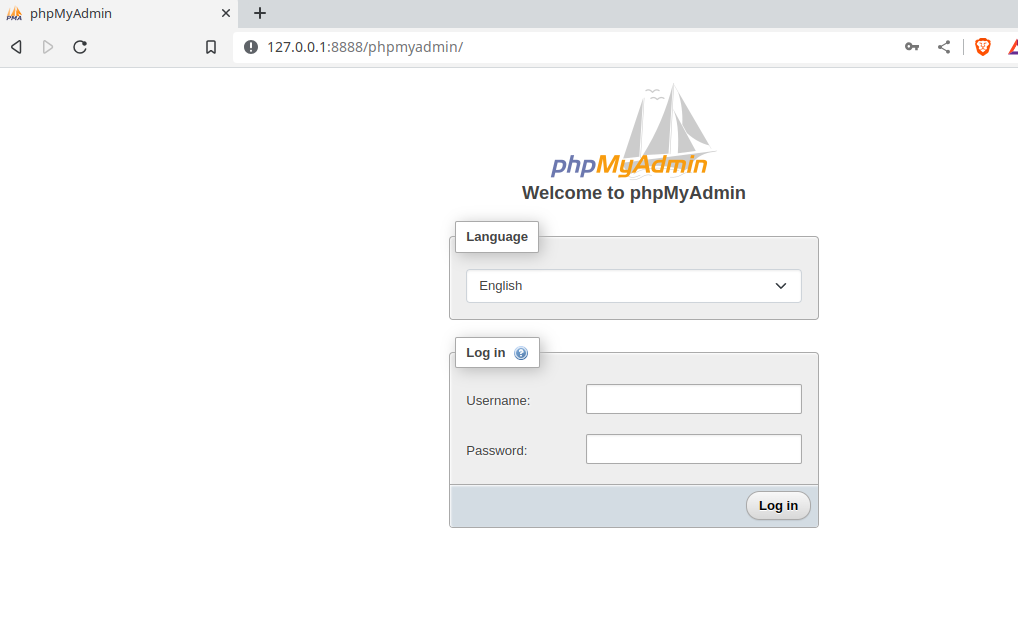
Access phpMyAdmin Securely
Important: never expose phpMyAdmin publicly. It’s a prime target for brute-force attacks. Always use an SSH tunnel:
ssh -i ~/.ssh/mikey.pem -L 8888:127.0.0.1:80 bitnami@YOUR_PUBLIC_IP
Then open http://localhost:8888/phpmyadmin in your browser.
If you manage databases frequently, consider desktop tools like DbGate or Beekeeper Studio — they connect via SSH tunnel, support multiple database engines, and are considerably more comfortable and secure for day-to-day use than a web-based phpMyAdmin.
Enable SSL with bncert-tool
Bitnami ships its own assisted tool for SSL certificate setup. Before running it, make sure your DNS already resolves correctly to your IP:
/opt/bitnami/bncert-tool
The wizard automatically configures:
- Let’s Encrypt certificate for the apex (
yourdomain.com) andwww - HTTP → HTTPS redirect
www→ apex redirect (or the other way around)- Automatic renewal every ~80 days
Done — HTTPS running without touching a single Apache config file.
Maintenance and Backups
Before any significant update or change, create a manual snapshot from the Lightsail console (instance Snapshots section). It’s free up to a certain size and can save you from a bad day.
For automatic OS and Bitnami stack updates, enable Automatic snapshots in the instance settings — you’ll always have a recent restore point ready.
If you’re running WordPress and want to remove the Bitnami banner:
sudo /opt/bitnami/apps/wordpress/bnconfig --disable_banner 1
What’s Next?
With these steps you have a functional, secure, and reasonably cheap LAMP environment.
If you need more database power without jumping straight to RDS, Lightsail Databases is a sensible middle ground: managed database, automatic backups, no MySQL configuration to touch.
And RDS? Hopefully I’ll get to dig into it properly someday… though I’ll admit that just thinking about a misconfiguration sending the bill through the roof gives me pause.